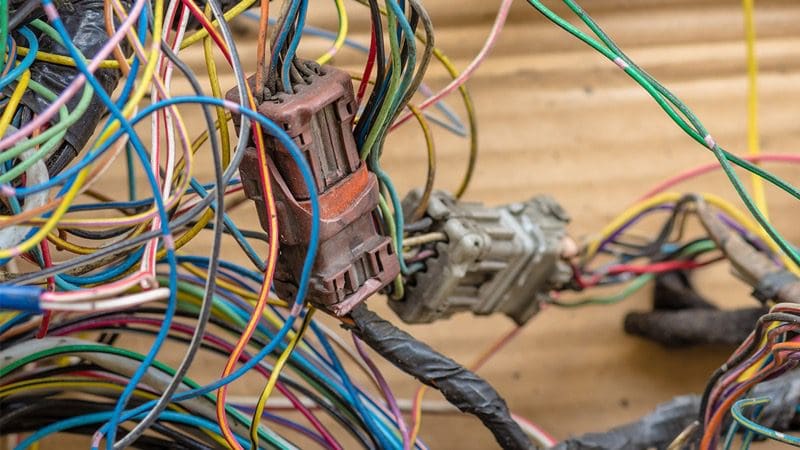
If you’ve been a reader of BestCarAudio.com for any amount of time, then you’ll know that we harp on choosing a reputable installer to do work on your car. We’ve also suggested repeatedly that you will want a tour of the facility and should ask to see examples of their work to qualify their skills and subsequent suitability to work on your car. We’ll never stray from this, as proper installation is the most important part of upgrading your vehicle’s audio system, car alarm, remote car starter or any other convenience product.
 While traveling to a trade show in Long Beach, California, a few weeks ago, I spent some time working on ideas for new articles to help educate our readers about the products and services available to them from their local mobile electronics specialist. In my notes, the references to choosing someone qualified repeated themselves again and again. It was at that point that I realized that many people might not know what proper wiring or a proper installation looks like.
2019 will mark my 32nd year in the industry, and I’ve seen everything from wiring that could be considered artwork to disasters that I can’t believe hadn’t already caught fire. In this article, we are going to provide a behind-the-scenes look at what’s right and what’s wrong, with the help of some industry friends. We hope you find this useful.
Radio Wiring
For most installations, your installer will use a wire harness adapter to connect your new radio to the wiring in your car. A wire harness adapter has a connector that is the same as the plug (or plugs) on the back of your radio, then a series of pigtails that are color-coded to work with the plug that comes with the new radio. In many cases, matching the wires color-for-color and making a solid electrical and mechanical connection is all that’s required to get the new radio working.
With that said, many installations will require an interface to connect the buttons on the steering wheel to the new radio. This interface needs to be programmed by an installation technician for your vehicle, and, of course, wired into the harness.
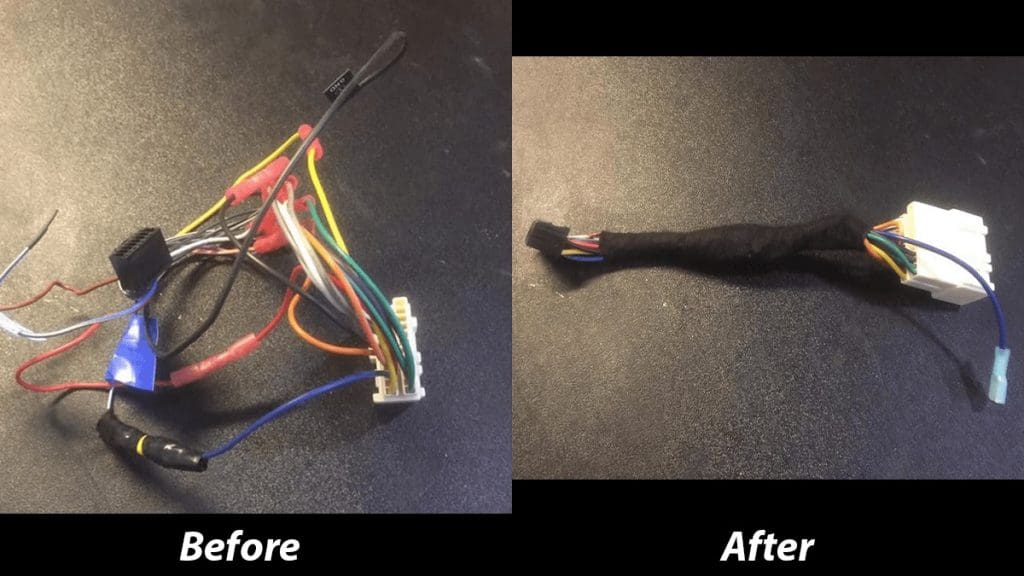
Thanks to Mike Schwitz and the team at Sound Connection Inc. in Waite Park, Minnesota, this image shows the same harness both before they performed work on it and after, with each connection soldered and protected with heat shrink tubing. Finally, they wrapped the entire harness in automotive-grade fleece tape to prevent it from buzzing and rattling in the dash.
Proper wiring management extends far beyond simple radio installations. Jesse Sprister at Drive Customs in San Luis Obispo, California, sent us these before and after photos of a two-way radio installation in the center console of an ambulance.
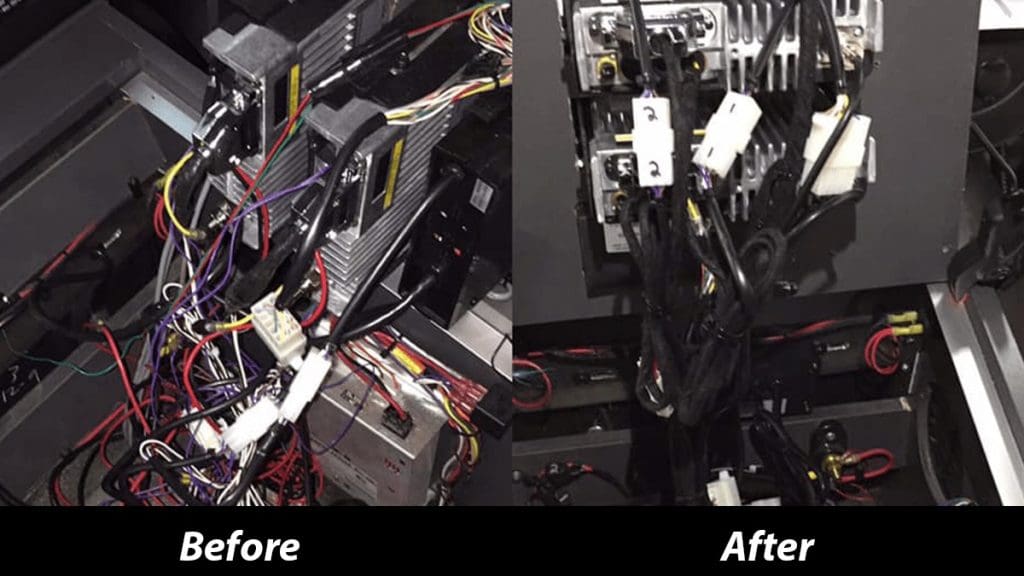
Imagine how much time could be wasted if a technician or mechanic attempted to troubleshoot any part of this mess had it not been cleaned up.
Speaker Installations
Installing new speakers should be a relatively easy task. With that said, every time someone says a task is easy, someone else replies, “Hold my beer.”
Here’s another pair of photos from Mike and the crew at Sound Connection. The customer came to Sound Connection complaining that the new speakers didn’t sound much better than the old ones and that they buzzed when there was bass in the music.
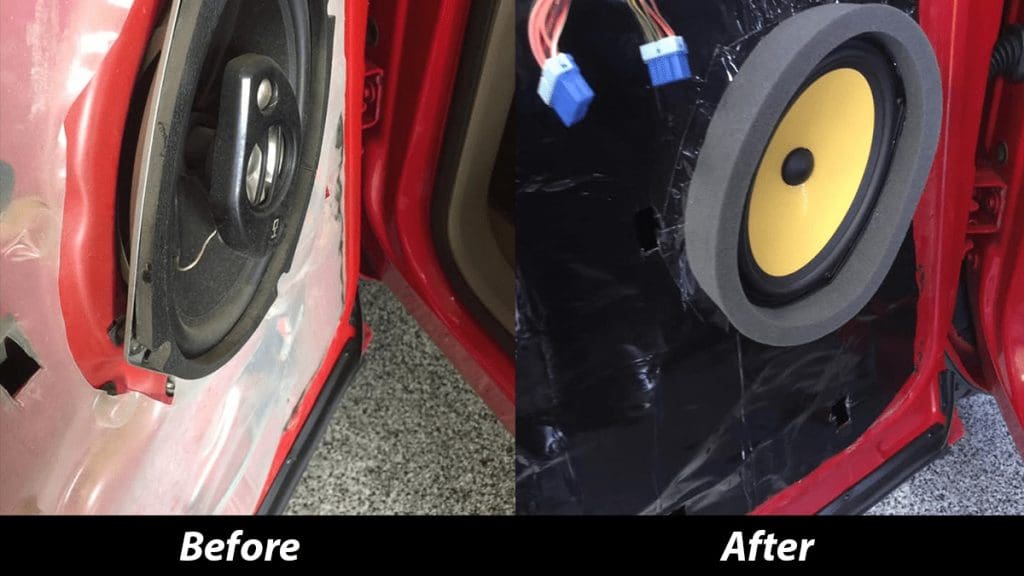
This image shows four upgrades over the “before” condition. The client has upgraded to a component speaker that will produce a more accurate and realistic soundstage across the listening position. The speaker is mounted securely so it won’t buzz and rattle when the bass hits. The door has been treated with sound deadening material to improve back-wave isolation and reduce noise transfer into the vehicle. Finally, a set of acoustic coupling gaskets help to seal the speaker against the door panel and improve performance.
Amplifier Installations
When it comes to wiring amplifiers, there are lots of chances for unskilled people to get things wrong. Here we have some great before and after photos of an installation saved by Mike Hungerford at KarTele MobileElectronics in Waterbury, Connecticut. The client brought in this rat’s nest of wires on the back seat of his Jeep.
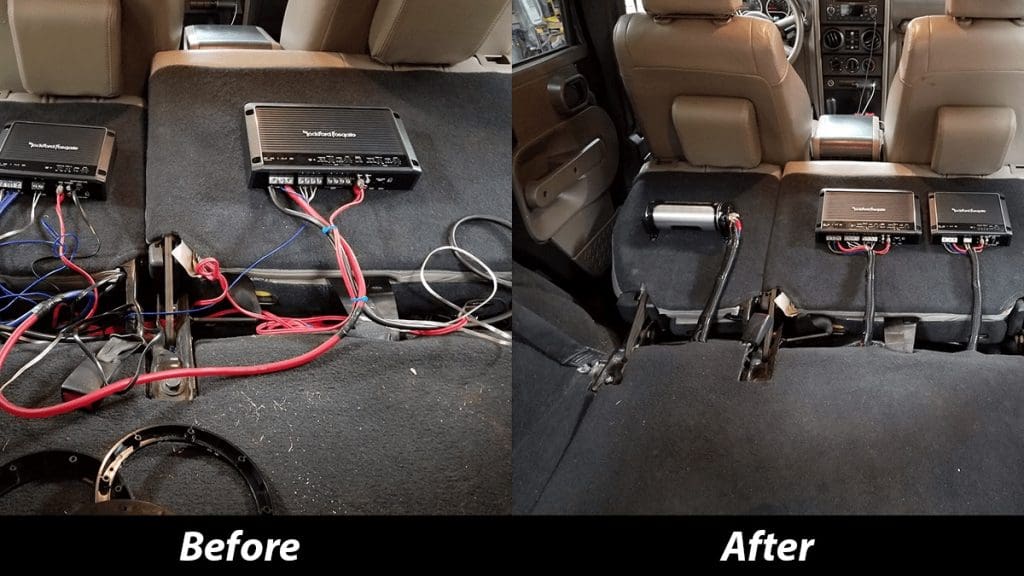
The KarTele MobileElectronics crew straightened the amps and added a stiffening cap before neatly routing all the wiring to and from each amplifier.
Here’s another scary before and after from Shawn Hawley and the guys at Certified Autosound and Security in Abbotsford, British Columbia. This wiring mess and its prodigious use of purple and black tape is a prime example of how not to integrate anything into a car.
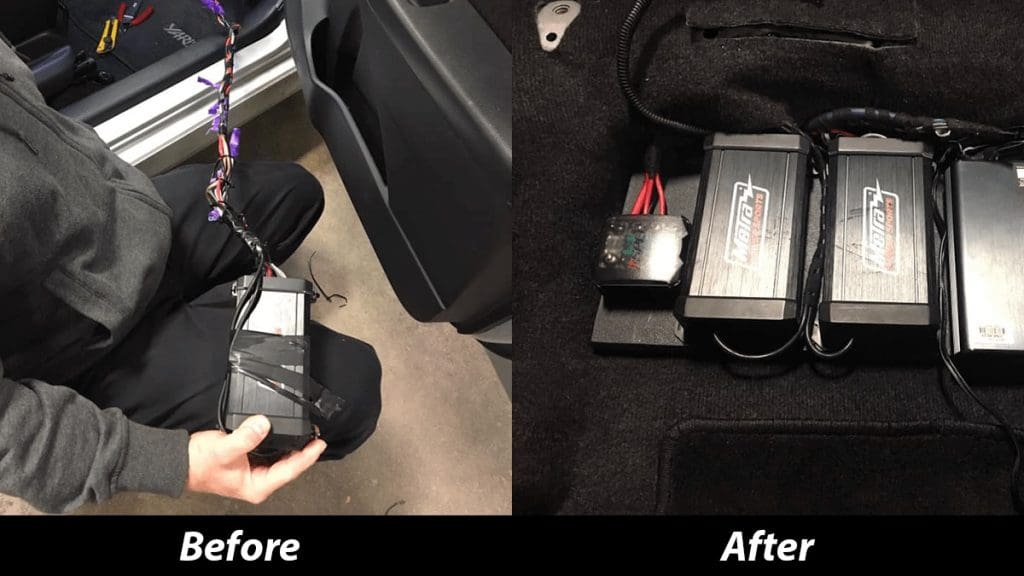
Here, we can see a simple amp rack with proper power distribution for the pair of Metra Motorsports amplifiers.
Motorcycle Audio
If ever there was a surefire way to find disastrous wiring, a look under the fairing of a motorcycle that has received an audio system upgrade would be the best bet. Steve Milburn from Sound Advice in Everett, Washington, sent us these before and after photos of a Harley-Davidson audio system rescue they completed. Among the disasters, it’s worth pointing out that windshield butyl tape is NOT a secure way to attach an amplifier to the fairing. Exposed resistors (near the pink butt connectors) and unterminated speaker wires are just a few more highlights of this catastrophe.
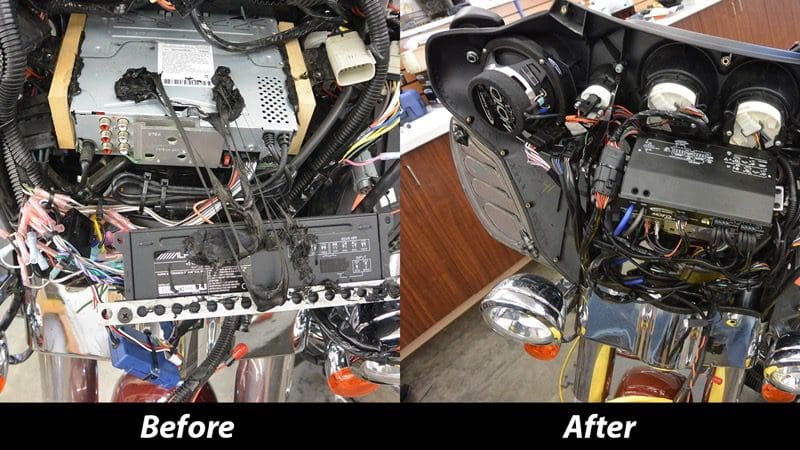
Sound Advice not only cleaned up the installation, but they installed motorcycle-specific equipment from ARC Audio that is designed to handle the shock and vibration associated with this environment. The amp is one of the most efficient on the market, providing amazing power with minimal current draw to the limited electrical system found on motorcycles.
Here’s another dramatic before and after found on a 1999 Harley-Davidson. The team at Vibe Audio in Red Deer, Alberta, was asked to fix up a botched installation. Here is the mess from before. Clearly, having access to zip ties and electrical tape is not enough to make someone a true installation technician.
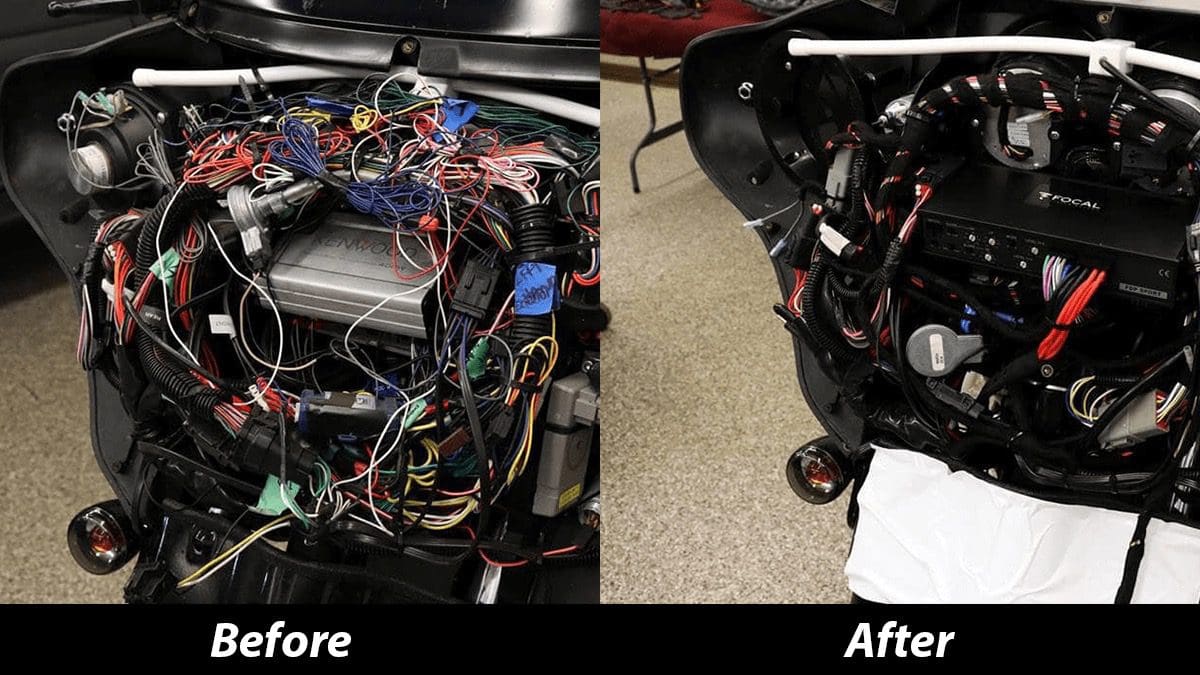
The Vibe team cleaned up the wiring and installed a new amplifier for the client. Guess which system will be more reliable?
Remote Car Starters
If you thought motorcycle installations could be bad, wait until you see the mess someone unqualified can make under the dash of your car or truck while trying to install a remote car starter. Here are a few more great saves from our friends at Certified Autosound and Security and Vibe Car Audio. Imagine that, remote starter pics from Canada? Who’d have thunk it? Remote starter wiring “performed” by a dealership in Red Deer, Alberta.
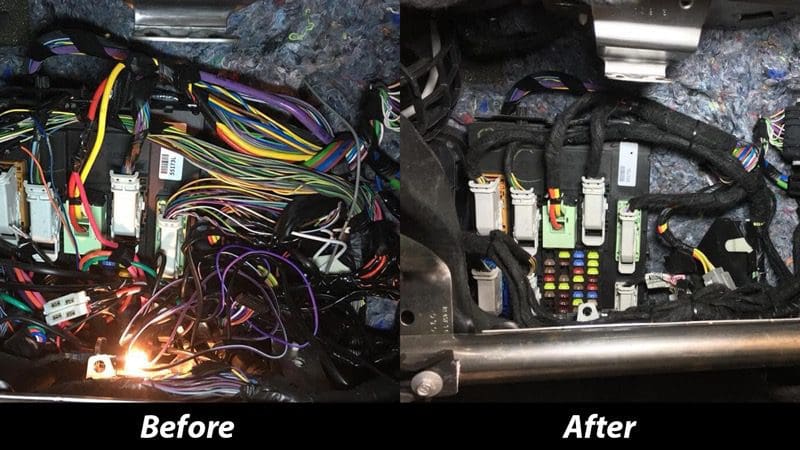
Proper wire management with automotive-grade cloth tape and careful planning by the Vibe Car Audio team.
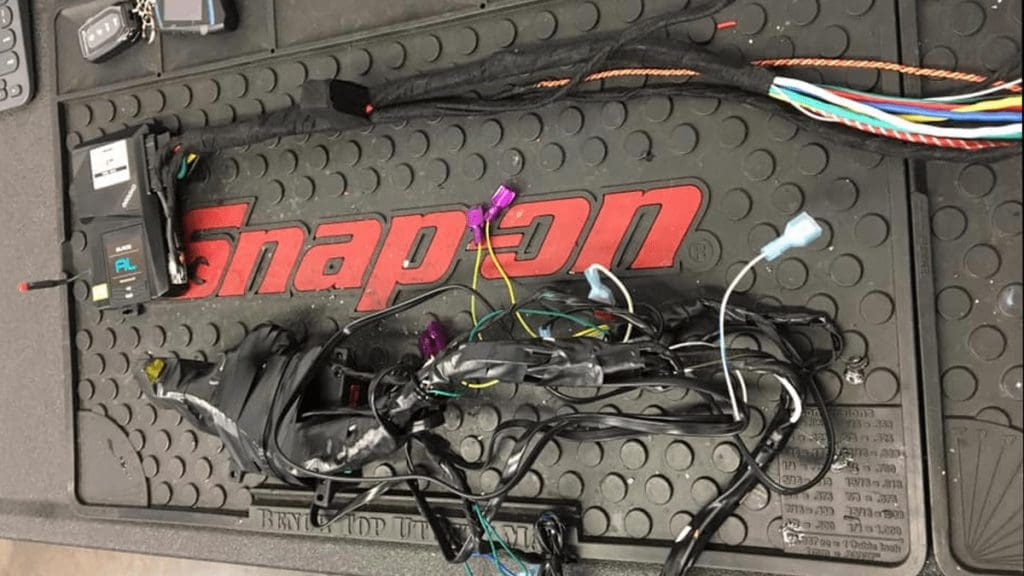 Two ways to skin a cat. Similar remote car starter modules, with the unit on the bottom removed from a client’s vehicle after they reported unreliable operation. The new starter system on the top is ready for installation with all the wiring properly prepared.
If you think this sort of thing is uncommon, sadly you’re wrong. Our friends at Sweet Sounds in Mankato, Minnesota, made this video about a client’s vehicle that had been butchered by someone incompetent. Check it out:
Choose Your Installer Wisely
As you can see, what’s visible on the surface isn’t always what matters. Having a look under the dash, under your motorcycle fairing or behind the door panels reveals a lot about the quality of an installation. While none of these repairs was taken to the level of being considered exotic, they will all add reliability to the upgrade, and that’s what we’re after.
