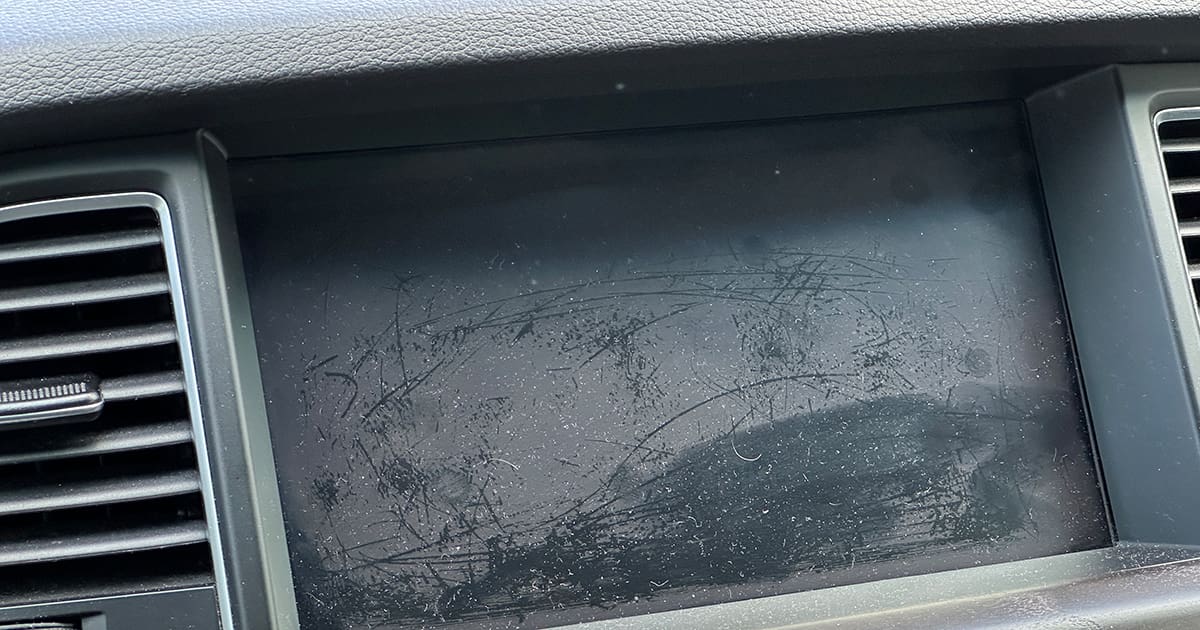
Has the touchscreen of your car radio started to look hazy? Is it more than five years old? We were staring at the display in one of our employees’ vehicles and realized it looked horrible. We started wondering if it might be possible to repair or rejuvenate the screen. Let’s see what we came up with.
Car Radio Touchscreen Technology
The most popular interface for multimedia car radios is called a resistive touchscreen. These interfaces use a pair of thin plastic sheets coated with a conductive film. A narrow air gap separates the two films. When you touch the screen, you connect the two film layers to complete a circuit. The supporting electronics can calculate the X and Y locations and feed that information to the microcontroller.
Resistive touchscreens are relatively inexpensive but are somewhat fragile. If the outer plastic layer is dented or damaged, the electronics might interpret that deformation as a permanent touch event. Of course, touching the screen in a different location won’t work. Water damage is another issue. Many screens become damaged when liquids infiltrate the gap between the films. If too much cleaner is used on the display or you spill coffee on it, damage can occur. In most cases, touchscreens aren’t repairable.
If you hit the screen hard enough, you might break the thin glass layer underneath the resistive plastic layers. As you can imagine, this type of damage also isn’t repairable. However, on some radios, more so on factory-installed units, the touch interface is separate from the actual color display. The touch interface might be replaceable, bringing the radio back to functionality. Our friends at Motron Automotive Electronics in London, Ontario, repair many touchscreen interfaces on factory-installed radios each week.
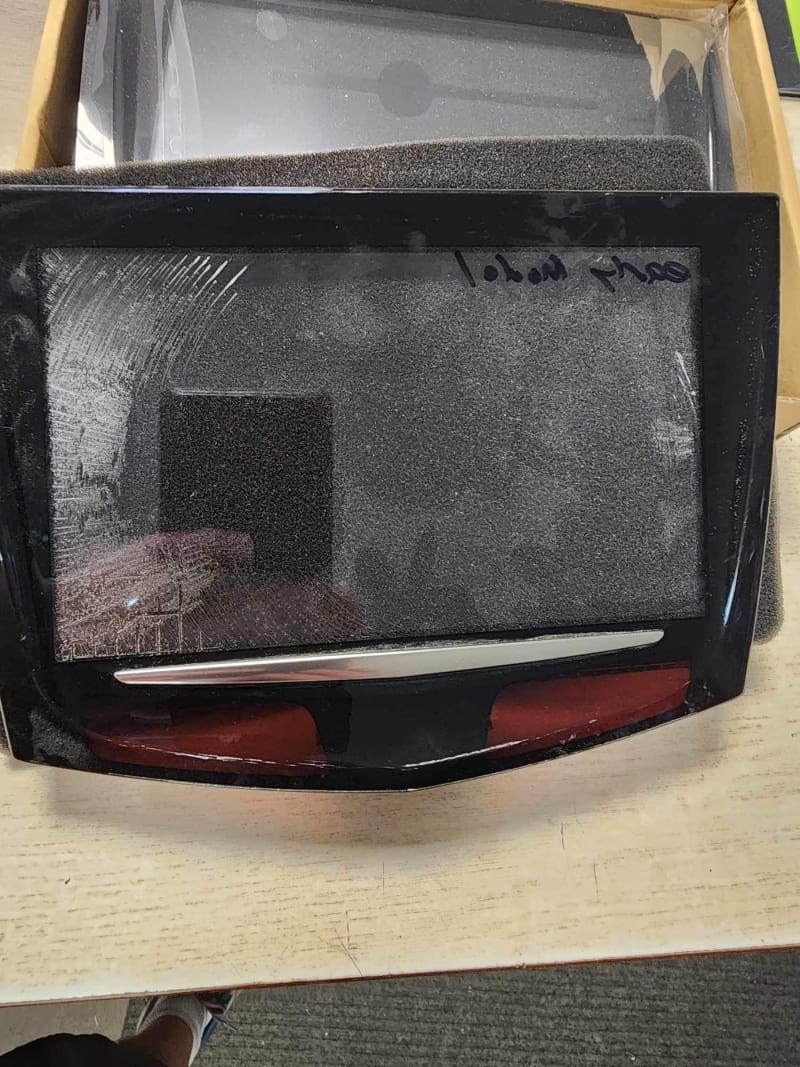
Another drawback of a resistive touchscreen interface is that it doesn’t offer the same clarity as the more expensive capacitive-touch displays. The two film layers are translucent but not completely invisible. As such, the color display behind the touch interface isn’t as easy to see in bright sunlight.
Do Touchscreens Wear Out?
We were sitting in a 2015 Hyundai a few months ago and noticed that the touchscreen had become quite hazy. It showed what appeared to be scuffs and scratches from where it had been touched the most. This observation prompted a discussion about how much the screen had been used. This vehicle has a rotary controller in the center console and buttons on the steering wheel, which are far more convenient to use than reaching for the display. We estimated that in the time the car has been in service, the screen couldn’t have been used more than 50 times. Backing up our hypothesis, the vehicle has less than 50,000 miles on it.
We continued to consider what could have caused the damage. We eventually surmised that the issue might not be contact damage but damage from prolonged UV exposure. We’ve all seen plastic headlights turn yellow. That yellowing is the top layer of plastic oxidizing. If our hypothesis is accurate, then perhaps we can polish the layer of oxidization off the display and, at the very least, make it look acceptable.
We did some research, and sure enough, others have come to similar conclusions. The “internet go-to solution” seems to be to polish the display with Meguiar’s PlastX polish. We saw someone else suggest using toothpaste. The latter seemed a bit scary as toothpastes can vary dramatically in the amount and sizes of the solids they include. Other people have used automotive paint polish. You don’t want to use an aggressive cutting compound, as the plastic is much softer than paint. A fine polish intended as a final process to bring out the glossy appearance is a better choice. Another suggestion we will try is to mix up a slurry of baking powder and water.
Last but not least, we’re going to try Brasso. In our high school days, the teacher overseeing the model car club mentioned using Brasso to polish the plastic bodies after painting them. Worth a shot!
Before we went poking and prodding at the display, we decided to check the replacement cost in case something didn’t go as planned.
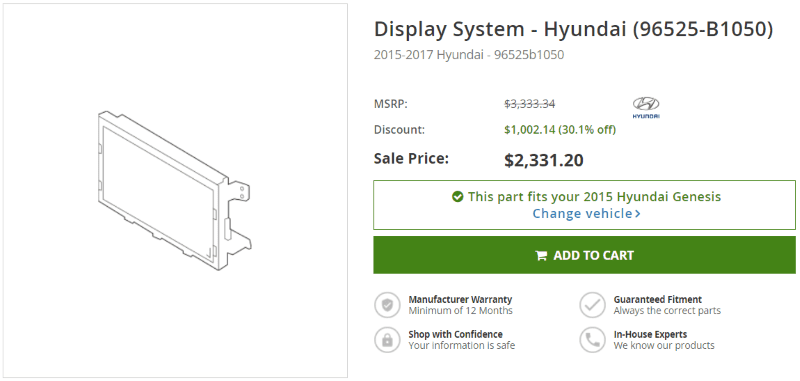
As you can imagine, our desire to experiment with this incredibly overpriced part faded quickly. Never fear; we called Lee Campbell at Motron to see if they had something we could experiment with. Sure enough, they had an older display that would be perfect for our experiment. With the screen in the mail, we headed out to find the chemicals for our test.
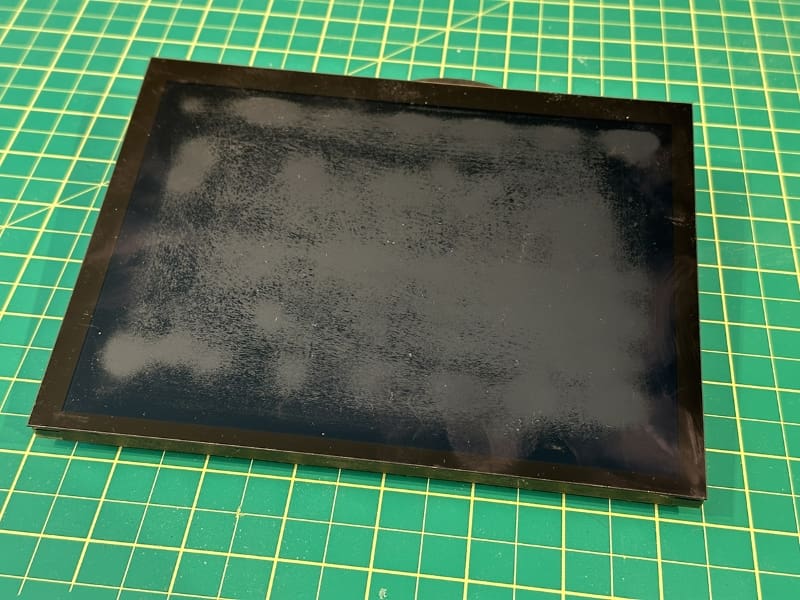
Polishing the Coating on a Touchscreen Display
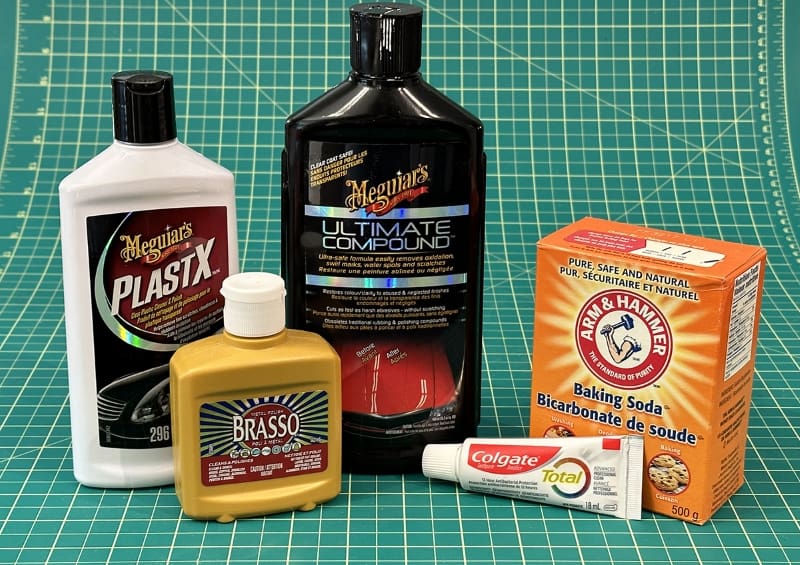
We’ll start by dividing the display into six sections to look at the results from the different chemicals. The first test will be the PlastX in the top left corner. Meguiar’s notes that this polish should restore clarity to rigid and flexible plastics and that it should remove cloudiness, yellowing, oxidation and fine scratches. The MSDS sheet notes that it includes alumina as an abrasive and dimethicone as a gloss enhancer. It also appears to have a dozen different fragrance components.
Below the PlastX, we’ll try the Brasso. Brasso has been around for over a century and is a very popular fine metal polish. With that said, its use as a plastic polish is widespread. Wikipedia mentions polishing CDs and DVDs, Lego minifigures and crystals on watches. The Safety Data Sheet lists pumice as the polishing agent, while Wikipedia lists silica powder. Another ingredient is ammonia, which might pose a problem on soft plastics.
In the top center square, we will try Meguiar’s Ultimate Compound. The Meguiar’s website notes that this product cuts quickly but doesn’t leave swirls or scratches. The MSDS lists alumina as the abrasive and plant oil as the glossing agent. A key marketing component of Ultimate Compound is that it’s supposedly safer than traditional compounding agents. We’ll see how it fares.
Below the Ultimate Compound in the lower center square, we’ll try Arm & Hammer brand baking soda. The Arm & Hammer website notes that popular uses are baking, cleaning, whitening and deodorizing. The ingredient information lists only sodium bicarbonate. Further research shows that baking soda and sodium bicarbonate are the same thing. We’ll mix the baking soda with water to make a paste that’s a bit thinner than peanut butter.
The last chemical we’ll use is toothpaste in the top right square. We were going to try Crest 3D White, but we felt it might be too aggressive on the plastic since it contains hydrated silica, mica and titanium dioxide. After all, it’s designed to polish the stains off your teeth. Instead, we found some Colgate Total that contains silicon dioxide and zinc. Jewelers and geologists have used toothpaste to polish gems and minerals. Polishing aluminum is another popular non-dental application.
We will leave the bottom right corner of the screen unpolished as a reference.
Our Touchscreen Polishing Results
The photo below shows the results of a few minutes of polishing with the chemicals listed above on a microfiber cloth. We used a clean cloth to remove the polishing chemical before moving to the next section.
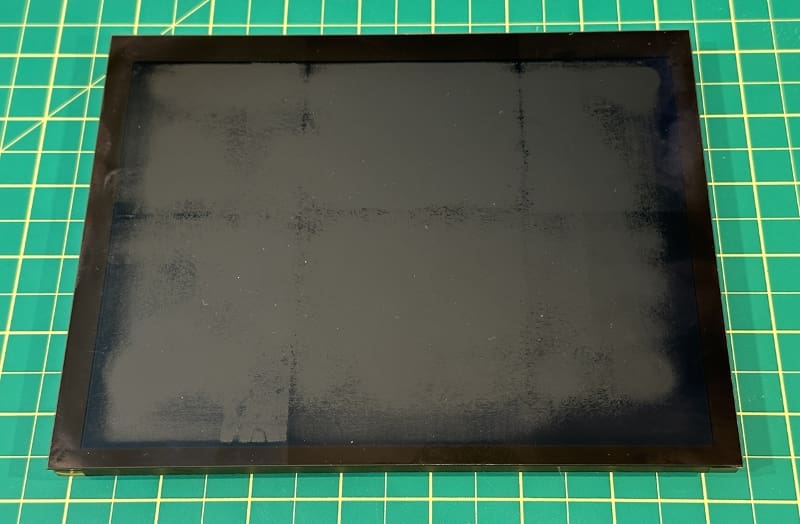
Let’s look at this in the same order in which we described the chemicals. Starting in the top left corner, we have Meguiar’s PlastX polish. The polish is very thin with a very slight oily consistency. We rubbed the panel in circles, covering the entire area four or five times, then worked in an up-down, then left-right pattern. The PlastX removed some haze, but the difference wasn’t significant. This polish might not be aggressive enough for this application.
In the bottom left corner, we tried the Brasso metal polish. The Brasso has a thicker consistency and felt like it was more abrasive. However, the results are similar to the PlastX, if maybe a few percent better.
In the top center, we had the Meguiar’s Ultimate Compound. Unsurprisingly, the compound felt stickier, as though it was cutting more aggressively. The residue it left was the second most difficult to remove, though it was not a disaster. Looking at the results, the compound made a significant difference. It left the panel with an even finish that was free of the blotches that showed in the original photo.
In the bottom center, we had the baking soda. What a mess. The soda slurry dried up very quickly as it contained none of the oils that kept the other polishes slippery. We expect to find little dried-up baking soda chunks in the lab for the next couple of weeks. The baking soda was also the most difficult to clean up. The bottom line is that the results are noticeable, but we’d skip this option given the mess it made.
Last but not least was the toothpaste in the top right corner. It also didn’t have a noticeable effect on the haze. It was a bit difficult to clean up.
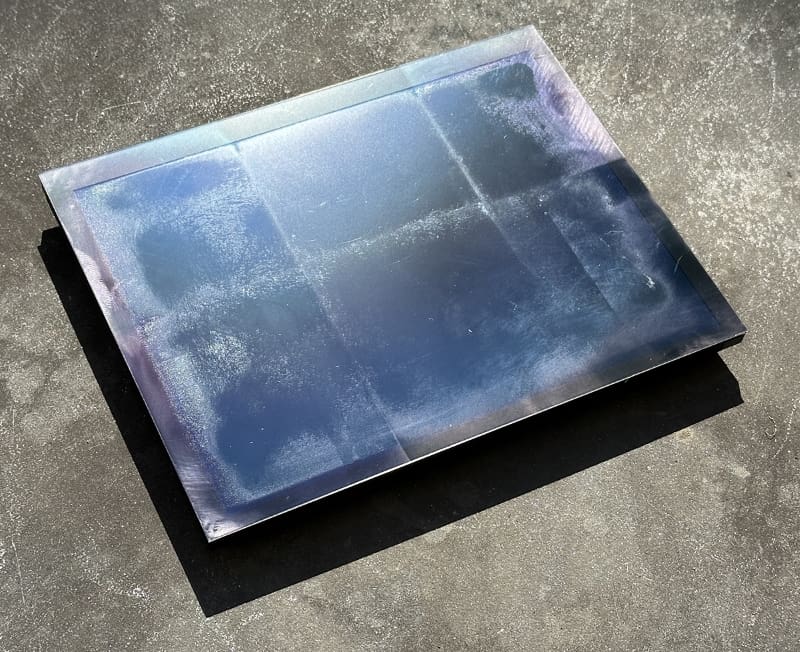
If we were to spend more time with any of the polishes, we don’t doubt they could deliver better results. In our opinion, the Brasso or the Meguiar’s Ultimate Compound are the better options. We did note some scratches in the film after using the compound, but we can’t verify whether they were there before we started.
Our Final Thoughts on This Touchscreen Repair Experiment
As we wrap this up, we have to express a concern. The antiglare coating on touchscreens is deliberately hazy and designed to diffract light rather than reflect it. Too much polishing could increase glare issues if you remove this layer. The touchscreen interface might look better cosmetically, but the display might be more challenging to see in adverse lighting conditions.
Another issue we’ve heard of is that the polish can get trapped under the trim panel around a display in your vehicle’s dash. Many people report damaging their screens while trying to remove the excess polish. Further, getting into the corners to polish the entire surface evenly is difficult. Since all of us here at BestCarAudio.com have extensive car audio installation experience, it’s not an issue for us to take a dash apart in preparation for a similar experiment in a personal vehicle. If you want to attempt this, we strongly recommend having a professional remove the display from the dash or the radio before beginning.
Of course, you are 100% on your own, and we won’t be responsible if you try to polish the display on your radio and damage the display or any other part of the vehicle. We wanted to share this experiment with our readers, and the content of this article is not advice or a suggestion. We also have no idea if this would work on a capacitive touchscreen.
If the display on the multimedia radio in your vehicle seems oxidized, and you feel brave, ask a local specialty mobile enhancement retailer if they are willing to remove the display from the dash or take apart the radio so you can access the entire touchscreen assembly. Take your time and work slowly. You only want to remove the oxidization.
